Tuesday, November 29, 2011

Butternut Squash Ravioli with Sage Brown Butter


I should have wiped the edges of the bowl before taking the picture.


I made these for Thanksgiving. I put them in the easy, but time consuming category. They are well worth the time though. Yum yum yum!

Ingredients
For pasta:
About 6 eggs
About 1/4 of a 5 lb bag of flour

For filling:
1 small to medium butternut squash (less than or equal to 2 lbs)
a bunch of fresh sage
8 cloves of garlic
a few tablespoons olive oil
salt and pepper
pine nuts
grated parmesan cheese


Put flour in a huge bowl or on rolling mat on the counter. Make a well in center. Crack in eggs. Beat eggs with a fork, then blend into flour until too stiff to use fork. Then knead with hands until well mixed. Dough should be soft but not sticky (or crumbly). If too sticky, add more flour. If too crumbly add another egg, or if you don't need that much liquid, add a little water. Form into ball, cover and put in fridge for at least an hour.

To make filling, peel squash, scoop out seeds and cut into cubes. Peel and mince or chop garlic. Toss squash with garlic and olive oil. Bake at 425 degrees for 30-40 minutes or until soft. Chop a small handful of fresh sage. Mix into squash. Salt and pepper to taste.


Cut ball of dough into 5 or 6 slices. Then comes the fun part where you get to use machinery! I use the Pasta Queen. It's essentially the same as the machine my grandmother used and taught me how to make fresh pasta with. The ravioli press I bought at Williams Sonoma.


Flatten slice into round disk.


Put through pasta machine at the widest setting, which on my machine is 1. Then put it through at 2. I was always told to put it through each setting twice. I do it the first time (setting 1) but then I put it through subsequent settings just once. I skip setting 3 altogether and go straight to 4. I'm such a rebel. Finally I put it through at setting 5. I don't do 6 because it makes the dough so thin the dough tears.


Lay the dough over the ravioli press.


Push the mold lightly into the dough to make the pockets.If you get a small tear or two, just cut a piece of dough and patch it. If you get a lot of tears, you should probably stop the machine one setting early.


Patches for small tears.


Scoop a small amount of the filling into each pocket.


Fold the dough over (or lay another piece on top if your pieces are shorter).


Pat the dough flat. Then use a rolling pin to press the dough into the ravioli, er, press. I made these at P's house. I guess most single men don't own rolling pins. He doesn't, so I used a glass. It worked just fine.


Pull the extra dough that should have been cut from the edges. Save it. You'll use all the scraps to make another disk of dough.


Turn the ravioli press upside down and carefully push out each individual ravioli.


Voila! Wait. That's the wrong language. I guess I should say pronto!

The recipe makes this many plus a dozen that wouldn't fit on the piece of tin foil.

Once you are done, leave them out on the counter for awhile to dry out. Then put them into the freezer in a large zip lock bag. You can separate the layers with wax paper. When you are ready to cook them, dump them in a pot of boiling water and cook for about 5 minutes. They cook really fast. Drain and put into serving bowl.

Take about a dozen large sage leaves and a stick of butter and put in a frying pan over low to medium heat. Shake pan every so often. Cook for about 10 minutes, or until butter turns brown and gets little specks in it. Keep cooking until sage leaves get crispy, but not burned. Break up into bits with spatula.

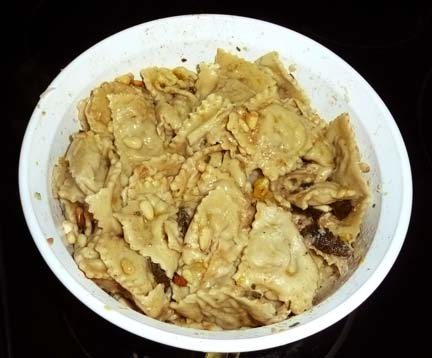
Toast pine nuts. Toss pine nuts, sage brown butter and a handful of grated parmesan with ravioli in a large serving bowl. Enjoy!

p.s. If someone seems really interested in what you are doing...

The evil kitteh

...be very wary about turning your back. That little stinker jumped on the counter and bit into 6 or 7 finished ravioli. She couldn't have eaten just one? No, she had to sample a half dozen. Bad kitteh!


Monday, November 28, 2011

A Small Success and a Large Failure

Or maybe that should be a large success and a small failure. Anyhow, I got a LOT done over the Thanksgiving weekend. So much that I'll have to break it up into several posts. First, the master bath. Here are some before-ish photos. Before-ish because these were taken after the faucet was installed, the ceiling painted, the walls sanded, one wall textured and paper put down on the floors. More boring brown.  You may have noticed that I'm not a fan of brown. I like wood and natural brown accents, but I don't really like brown paint, or brown tile, or brown metal.

Teeny tiny brown vanity, at least it's shaker style. Brown, "antique" bronze sconces.
The wall to the right had no texture so it had to be sprayed. Not that you can see that in this photo.
The ugliest tile in the world! But...it's functional and I'm broke.
If you remember, I painted a sample swatch that I didn't like.

Nooooooo.
 Instead, I decided on Benjamin Moore's Wythe Blue, the 2012 color of the year.

Better.
Trim, or "cuts" done.

Before the t.p. holder was installed.
After painting, I went about installing towel rods and t.p. holders. There were already pre-drilled anchor holes in the wall to the left of the sink, so I decided to use them. The problem is that towel rods come in 18" or 24: and these holes were about 21" apart.

Really boring photo of holes.
 So I bought the 24" rod and cut it to the right size with a hack saw.

This makes a yucky noise.

Ta-da!
Then I hung the hand towel ring and toilet paper holder. I had to look up where to place it. (About 9" above your knee when sitting on the toilet). Here is how the towel was hanging before.

Bad.
And after.

Good.


And now about those sconces...I bought some vintage 1920s aluminum ones from ebay. 

Oooh pretty.

I set out to replace the old (but not actually old) bronze ones. First I turned off the power. I flipped all the switches in the breaker since none are labeled. Note to self--label switches. I unscrewed the sconces.


 I disconnected the wire nuts.


THEN I realized that the antique sconces, although newly re-wired did not connect the same way as the bronze ones. The bronze ones screwed into the metal plate on the sides. The antique ones have one center screw. I guess I will have to screw a post into the piece of wood in the center of the electrical box before I can install my new, old sconces. Boo.

Hmmm...
I reattached the bronze sconces and turned the power back on. Everything works and I didn't electrocute myself. Phew! Next step to putty, prime, paint and hang the antique mirror/medicine cabinet I bought from Craig's List.

It's really hard to take a picture of a mirror without showing in the mirror.


Wednesday, November 23, 2011

Chirp..Chirp...Chirp...Chirp...Chirp...Chirp...Chirp...

The hard wired smoke alarm in my bedroom starting chirping at 1:30 in the morning. I replaced the battery with one that was in a non-hard wired smoke alarm taken down from the kitchen ceiling while painting.
It kept chirping. 

I didn't have any 9 volt batteries and wasn't sure where I would be able to get one in the middle of the night.
Besides, I'm paranoid. What if the smoke alarm itself is bad? It has gone off twice in the past couple weeks after I got out of the shower. It's supposed to be a smoke detector, not a moisture detector. Waving a towel in front of it got it to shut off both times. Maybe that should have clued me in that something was wrong. I should have changed the battery then. If the smoke alarm is bad, I'll have to buy a new one. Then I will have to figure out which breaker switch is the correct one so I can change out the alarm. They aren't labeled. I guess I could shut them all off as long as there is enough daylight to see what I am doing, but in the middle of the night? No. Changing a hard wired smoke alarm is supposed to be just like changing a light fixure--something I've read how to do, but never done. Not really something I want to do for the first time with no one around. I'm still have flashbacks to when I electrocuted myself.
I put in ear plugs and tried to go back to sleep.
No luck.

Other than my bed, I have no furniture in my house so it's not like I could go sleep on the couch or in the guest bed. I moved to the hard, dusty floor in the second bedroom. I shut my bedroom door and the door of the second bedroom.
I could still hear the chirping.

I put the ear plugs back in and shoved towels in front of both doors in case the sound was leaking out the bottom.
I could still hear the chirping.

I put the covers over my head. Chirp..chirp...chirp...chirp...chirp...chirp...chirp...

I eventually got to sleep but woke up about every 15 minutes the rest of the night because wood floors with no cushion aren't very comfortable to sleep on.  Have I mentioned that I am tired today? And maybe a bit cranky?

This morning someone told me that steam will sometimes set off a smoke detector and that a battery change is probably all it needs. I bought 9 volt batteries at lunch and drove home feeling hopeful, but apprehensive. I put in the battery and closed the door. One chirp, then blessed silence. Ah.

Monday, November 14, 2011

Oil Paint is Stinky

This weekend I painted baseboards and shoe molding. Oil-based paint is stinky. Before I show you more boring pictures of a white room with white baseboards and white shoe molding, I'm going to show you a before photo of the kitchen. Why? To truly appreciate how far the house has come, you need to see just how bad it looked when I bought it.

Gross!

See how disgusting and black the baseboards were? See how the yellow paint is at least 5 different shades? See where the stolen microwave used to be? See how nasty the floors were?

And look at the trim around the door between the kitchen and back hall. Ew!

Both sides of the door trim
Look at the kitchen now--primed and ready for paint with straight, smooth door trim replaced by P.

It's not done but I can already hear the angels singing hallelujah.
Door trim after. No lumps or bumps!
 See what I mean?!? What a difference!

So back to my bedroom. This part of the house is newer, so the baseboards weren't as bad, but they still had streaks and scratches and grime. I washed them, sanded them and painted them with high gloss white, oil-based paint.

After sanding
After painting but before shoe molding was attached
With shoe molding

I still need to caulk the seam and nail holes.
Funny how the exact same color (Benjamin Moore's super white) looks different on the walls (latex with pearl finish) and baseboards (oil with high gloss finish).

I also painted a gazillion feet of shoe molding, which is the same as quarter round, but slightly more narrow. The whole house needs new shoe molding.


P cut the lengths I needed for the bedroom, then I went around with my pneumatic pin nailer and attached it. Pow! Pow! The pin nailed came with the air compressor, but this was the first time I've used it.

The goal was to get the bedroom completely done so I could move in. Yes, the rest of the house is still a construction zone, but I'll be able to go into my clean complete bedroom and shut the door. Stay tuned for the final reveal.

I'll leave you with some evidence that it is always good to buy and test paint samples before committing to a gallon. Here is the paint sample for the master bath on the wall. It looked like a pretty pale green in the store.

Holy fluorescence Batman!

Thursday, November 10, 2011

My House is Fancy!

P, the best BF ever!
See this man? This man is amazing! I didn't have to call a plumber. He fixed my hot water heater. He fixed my sink. That's right. I have a working sink--with running water and drains and a garbage disposal and everything! Thanks P! My house is all fancy and shit! But seriously, I didn't realize just how much I took for granted having a kitchen sink until I spent months washing my hands, buckets, paint brushes, etc. while bent over the bath tub.

It's so pretty. Look.

Dear sink, I lurve you. Dear ugly glue stuck to counter, soon you will meet the Grim Reaper. Mwahahaha!
Guess what temperature the water is? You bet! Hot! Woo hoo!
And my dishwasher? It runs. That's right. I feel so blessed. I am doing the Snoopy dance of happiness today. And guess what? The dining room has been primed. Here is the photo from the listing.
I wonder where you live now, oh stolen light fixture?
With the ceiling painted and new chandelier installed.


With the walls primed.


It's going to be a pale yellow, something between cream and butter. While sanding the walls I discovered that before it was cave brown, it had been yellow. My house is coming back to the light. It's not a dump anymore. I am starting to realize that it's actually going to be cute. I am excited!

And remember the Grimace purple dungeon, I mean bathroom?
Photo from the listing.
Everything was purple. Walls, trim, ceiling, door, baseboards. Everything.
 After the walls were retextured.


And primed.


With one coat of pale grey paint. One more to go, then the sink and toilet can go back. Won't I be stylin' then?!?


The tile still sucks, but that's a project for another day. Along with stripping the paint from the trim and doors. The to-do list for the rest of the house is long too--finish painting the walls, sand and paint the baseboards, re-install the shoe moulding, remove glue from kitchen countertops, and so on, and so forth, forever and ever, amen. But I think I might actually be able to move in Sunday. Yippee!